


Painting a staircase for durability and style
Why staircases need a different approach
Most decorating jobs forgive the odd shortcut. A hallway wall can be touched up in ten minutes, and nobody notices a slightly thin coat behind the coats rack. Stairs are a different matter entirely. Every tread on a staircase in a busy family home takes thousands of footfalls a year, and the paint has to cope with shoes, socks, bare feet, hoover bumps, laundry baskets, and the occasional tumble down the last three steps with a full mug of tea.
The result is that stair paint fails in predictable places: the nosing of each tread, the bottom step, the handrail, and the stringer where shoulders and shopping bags brush past. Good preparation and the right product matter far more here than on any bedroom wall.
Prepare properly before a brush goes anywhere near it
Preparation is where staircases are won or lost. Sanding is the unglamorous part, but it decides whether your topcoat lasts three years or ten.
- Clear the area completely. Stairs are a work site, not a thoroughfare, so plan an alternative route through the house or accept that the job will be done in sections over a few days.
- Wash down everything with a degreaser or sugar soap, paying particular attention to the handrail, which collects a surprising amount of skin oil, and the lower treads where outdoor dirt settles.
- Rinse and allow to dry thoroughly, then sand with a medium grit paper to key glossy or previously varnished surfaces. A sanding block or detail sander makes short work of spindles and mouldings.
- Fill cracks, dents and screw holes with a two-part wood filler rather than a basic decorator's filler, which can shrink and crumble under foot traffic.
- Sand back any flaking or chipped areas to a firm edge. Feathering the edges prevents the familiar ridge that appears when old paint lifts under a fresh coat.
- Prime bear wood, filler patches and any bare metal with an appropriate primer. Knots in softwood need a knotting solution, or resin will bleed through and leave brown patches within weeks.
Dust removal is the step most people rush. Vacuum, then wipe down with a damp cloth, and let everything dry fully before painting. Trapped dust becomes a rough, gritty finish that shows up badly in raking light from a hallway window.
Choose paint that can take a beating
For treads and risers, water-based acrylic eggshell or a dedicated floor and stair paint is the sensible choice. It dries quickly, stays flexible as the timber expands and contracts, and cleans up with soap and water. Traditional oil-based gloss is tough but slow-drying, prone to yellowing in low light, and unpleasant to work with in a confined stairwell.
Modern water-based glosses and satins have improved enormously and now rival solvent-based finishes for hardness without the smell or the twenty-four-hour drying times. Look for a product described as scuff-resistant or suitable for high-traffic areas, and check the recoat times carefully, because you will be applying several coats.
For handrails and spindles, eggshell or satin gives a softer, more forgiving finish than high gloss and hides minor imperfections in older timber. A wipeable matt emulsion is fine on the walls either side, but never on the treads themselves.
Finish with a clear matt or satin varnish over painted treads if you want extra protection, particularly on softwood stairs that dent easily. Two thin coats beat one thick one every time.
Painting order, drying time and practical staging
A staircase cannot be closed off for a week, so work in a sequence that keeps at least one route usable.
- Paint from the top down when doing walls and ceilings, so drips and dust do not land on finished work.
- Do alternate treads first, allowing you to use the staircase while the painted steps cure, then fill in the gaps.
- Alternatively, paint every other step on one day, then complete the rest the following day. This is slower but far more civilised.
- Tackle risers before treads. Risers are quick and mostly out of harm's way; treads need the longest drying window.
- Leave the bottom two steps and the top landing edge until last, because these take the most punishment.
Allow a full twenty-four hours before light use and several days before heavy traffic. Water-based paints feel touch-dry within hours but continue to harden for days or even weeks. Rushing this stage is the most common reason for a fresh coat peeling away within months.
Design choices that suit the space
Staircases are often the narrowest, darkest part of a house, so colour deserves thought. All-white treads and risers make a space feel airy but show every mark; an all-over dark grey or navy creates real drama and hides scuffs beautifully, though it can absorb light in a tight hallway.
A popular middle ground is painted treads with a natural or stained timber top, or a contrasting painted riser, which adds character without demanding constant cleaning. Two-tone schemes using a darker paint below the dado and a lighter shade above help a narrow stairwell feel taller.
Whatever you choose, buy enough paint for the whole job plus a little extra for touching up. Stair paint gets marked, and a small tin of the exact shade kept in the cupboard under the stairs will save you repainting a whole flight because of one scuff.
Small habits that keep stairs looking sharp
Once the paint has fully cured, protect it. Felt pads under any furniture that gets carried upstairs, a runner or stair carpet where traffic is heaviest, and a quick wipe with a damp cloth rather than an abrasive cleaner will all extend the life of the finish considerably. Avoid harsh bleach-based products on painted treads, as they dull the surface and soften the film over time.
Keep a note of the product and colour used. When a touch-up is needed in two or three years, matching it will be far easier, and the staircase will carry on doing the job it does best: quietly holding the whole house together, one step at a time.


Preparation
-
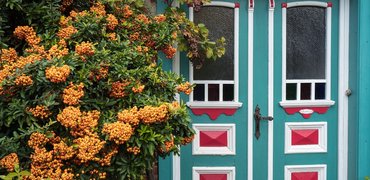
Choose a base shade, then add contrasting or complementary tones to define zones without making the whole space feel disjointed.

Colour


-

Long established fact that a reader will be distracted
-

Long established fact that a reader will be distracted
-

Long established fact that a reader will be distracted



Techniques
Karla Gleichauf
12 May 2017 at 05:28 pm
On the other hand, we denounce with righteous indignation and dislike men who are so beguiled and demoralized by the charms of pleasure of the moment
M Shyamalan
12 May 2017 at 05:28 pm
On the other hand, we denounce with righteous indignation and dislike men who are so beguiled and demoralized by the charms of pleasure of the moment
Liz Montano
12 May 2017 at 05:28 pm
On the other hand, we denounce with righteous indignation and dislike men who are so beguiled and demoralized by the charms of pleasure of the moment